Playcanvas
Repository: [https://github.com/borellion/sdk)
You will first need to create an ad unit on the marketplace in order to get started. Check out For Creators for more instructions.
Step 1 - Integrating Physics into your project
Borellion's Playcanvas integrations use the built-in Physics raycasting system for some checks. If your project does not already have physics integrated, you can do it like so:
Playcanvas Editor (1a)
- Open the Playcanvas Menu
- Click "Settings" at the bottom of the list.
- Click "Physics"
- Click "Import Ammo"
Playcanvas Engine (1b)
- Integrate Ammo physics into your project.
- Instantiate it like so:
import * as pc from 'playcanvas';

pc.WasmModule.setConfig('Ammo', {
    glueUrl: `ammo.wasm.js`,
    wasmUrl: `ammo.wasm.wasm`,
    fallbackUrl: `ammo.js`
});
await new Promise((resolve) => {
    pc.WasmModule.getInstance('Ammo', () => resolve());
});
Step 2 - Integrating the Borellion Banner component
Playcanvas Editor (2a)
- Download the production version of the integration at
https://cdn.borellion.com/sdk/borellion-playcanvas-sdk-editor.js. - Import the script into your Playcanvas Editor project and parse it (may require a refresh).
Playcanvas Engine (2b)
Install the latest version of the SDK from NPM:
npm install '@borellion/playcanvas-sdk'
Alternatively, if you are working directly in a browser environment, you may import it from https://cdn.borellion.com/sdk/borellion-playcanvas-sdk.js. Ensure that in your page's <head> you have an importmap set up for Playcanvas like the following:
<script type="importmap">
{
    "imports": {
        "playcanvas": "https://cdn.jsdelivr.net/npm/playcanvas/+esm"
    }
}
</script>
Once installed, import the Borellion component:
// NPM
import Borellion from '@borellion/playcanvas-sdk';

// Browser
import Borellion from 'https://cdn.borellion.com/sdk/borellion-playcanvas-sdk.js';
Step 3 - Bringing the Borellion Banner into your scene
Playcanvas Editor (3a)
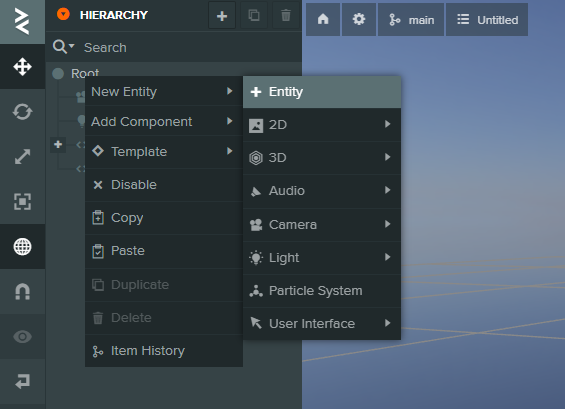
Create a new entity:
Attach a script component:
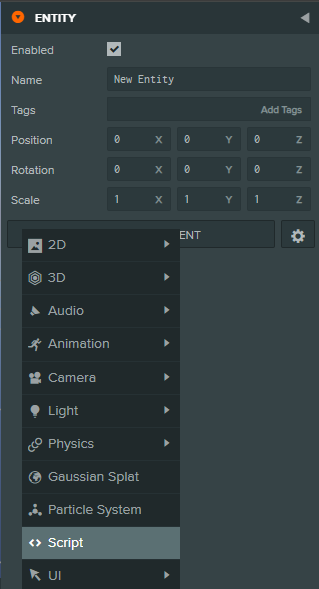
Add the borellion script:

You should now see the configurable fields for the Borellion Banner:

Playcanvas Engine (3b)
const banner = new pc.Entity();
banner.addComponent('script');
banner.script.create('borellion');
banner.script['borellion'].adUnitId = adUnitId;
banner.script['borellion'].format = format;
banner.script['borellion'].cameraEntity = camera;
banner.setEulerAngles(90, 0, 0);
app.root.addChild(banner);
You've now integrated the Borellion Banner into the scene! See the following section for further configuration details.
Step 4 - Customizing your banner display
These are the available attributes for your banner:
adUnitId required
The ID of your ad unit.
format required
Determines the aspect ratio of your ad unit. Valid options are Medium Rectangle, Billboard, or Mobile Phone Interstitial. Due to how Playcanvas handles enums, when working with the Playcanvas engine directly these options will be mapped to 1, 2, and 3 respectively.
- Medium Rectangle - 300 x 250
- Billboard - 970 x 250
- Mobile Phone Interstitial - 750 x 1334
cameraEntity required
The main camera entity in your scene. Used for checking raycasts against the banner.
prebid
optional - defaults to true
Boolean: Setting prebid to false disables Prebid/Aditude programmatic ad loading and fetches ads directly from Borellion's ad server. Use this if you need to avoid third-party cookies from demand partners.
Step 5 - Testing Locally
To test your integration locally with sample ads, add the ?debug=true flag to your URL (e.g., http://localhost:8080/?debug=true). This will load sample ads for testing purposes. Real ads will load when you deploy to production.